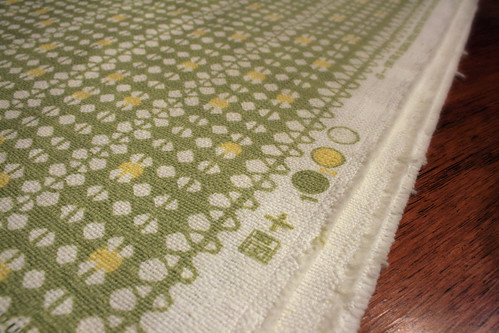
Woven Fabric
Most fabrics are woven - meaning they are produced on a loom and the fibers 'weave' in and out. The fabric will usually fray a bit. Mine frayed quite a bit and I had to 'finish' the edges before working with it. The edges were finished with a wide zig-zag stich.
Selvages (pronounced sell-vajuh)
The selvages are on the left and right sides of the fabric. The fabric store normally cuts perpendicular to the selvage. Usually the edges will look different or have a special finishing or print marks. The fabric is the strongest by the selvages. The selvages provide you with a straight edge to start your projects.
Lengthwise Grain
The threads that run parallel to the selvage.
Crosswise Grain
The threads that run perpendicular to the selvage. Fabric is usually cut off the bolt on the crosswise grain.
Right Sides
When instructions call for putting 'right sides' together you'll want to put the outside parts together. For my bag, putting 'right sides together' meant putting the patterned pieces facing each other. I pinned them together and then ran them through the machine. Once I was done I turned it inside out so the pattern was on the outside. Example of 'right sides together' below.
Making the Bag
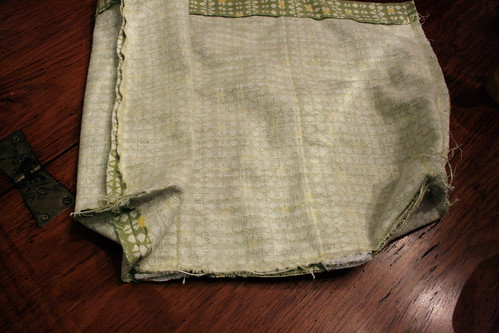
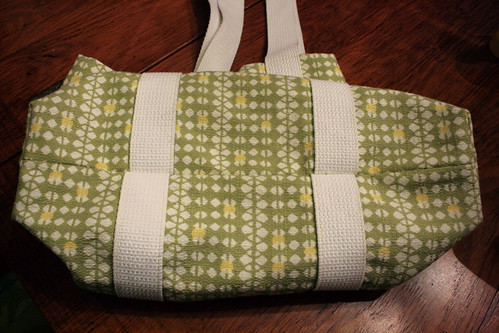
I measured twice (actually three times) before cutting my fabric, but in the end I wound up going less on the measurements and more by eye. The pattern on my fabric wasn't exactly vertical and to avoid it looking odd I wound up eye-balling it so that I wouldn't have odd tilts/cuts to the pattern. We first created a hem at the top, then stitched the handles on. You'll notice on the bottom of the bag that things don't really line up that well, but not bad for my first sewing project, right? I had hoped the yellow thread would show up more to give it some nice contrast but it's barely noticeable. I decided on 'grocery corners' which give the bag a nice 'bottom'.

A few things I might have changed/done differently:
- The bag is really floppy. You can see the difference in the photos below. I might try adding a liner to stiffen it up a bit. It might even be nice to have a slightly plastic fabric that can be wiped down - then I could use it for groceries.
- The handles are too long. I probably would have shortened them by 3-4 inches. We used 60 inch handles sewn on from the bottom of the bag.
- Choose a wider zig-zag stitch when putting the handles on. This might have showcased the contrasting yellow thread better.
- Made the grocery corners a bit larger. We used a 2 1/2 inch measurement, but for me 3 1/2 - 4 would give the bag a nicer base.
Bag without anything in it:
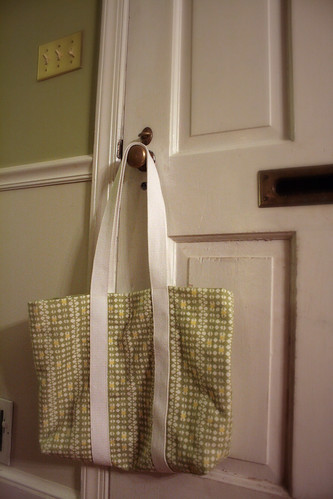
Full bag:


No comments:
Post a Comment