First let me say that I love Yo Gabba Gabba. I've been hooked ever since I saw 'Party in My Tummy' on YouTube. How can you not smile and laugh at the carrots & green beans who want to go to the party in Brobee's tummy? Mike loves Yo Gabba Gabba. And so does Q. Everytime he sees DJ Lance he get a huge smile on his face. We don't let him watch much tv, but we give an exception to Yo Gabba Gabba because we like the music and think it's funny.
I had hoped to post this prior to Halloween, to (hopefully) help people who might want to make a DJ Lance costume, but this costume took me way too much time. I made a ton of mistakes while trying to follow the pattern, had to re-do the shirt, and had to actually take the seams out of the pants and re-sew them. So, I can't really give you a good step by step account of how to do this. I can however, give you a few tips of advice in case you do decide to embark on this adventure.
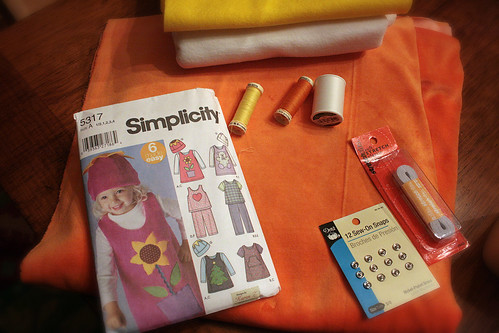
First I must thank Lumpyhead's mom for her blog post from Halloween 2007. Without it I would never have been able to pick out a pattern.
If you do choose to make a DJ Lance costume, here are some of my tips:
1. Do you know how to sew? Really, do you?
I had taken 1 class in sewing. One. Sure, I know how to sew a button and mend a hole, but I'd only used a sewing machine twice. I'd finished a simple bag and had halfway finished a shirt. I had only followed a pattern with help. And I'd never made a pair of pants. You will need a sewing machine and many free hours of time. If you lack knowledge and access to any of the above then I suggest you go out and buy a pair of white pants and shirt, dye them orange, and then get the iron on stuff to fuse the decorations on. It will be much, much easier (and probably cheaper). Trust me. The hat though, that will be a toughy without doing it yourself. That was one of the easier things though to sew. Plus it's fuzzy so your mess-ups won't show much.
2. Don't always follow the pattern.
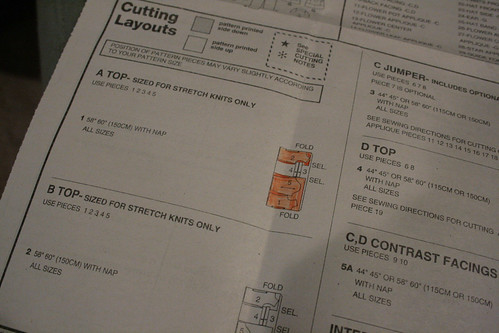
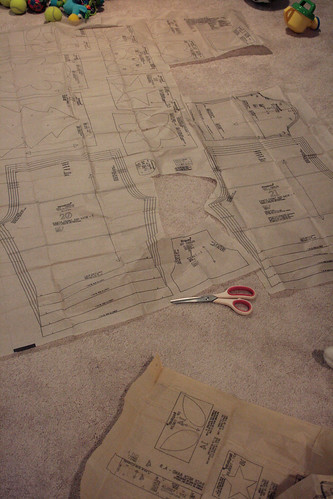
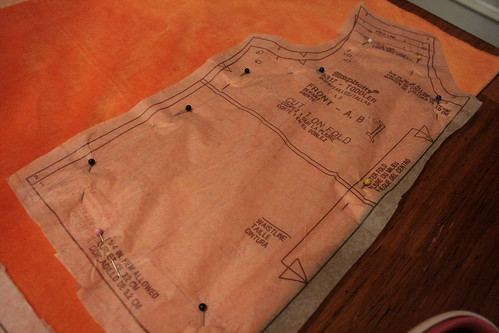
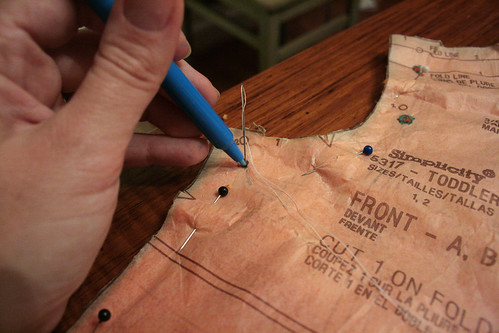
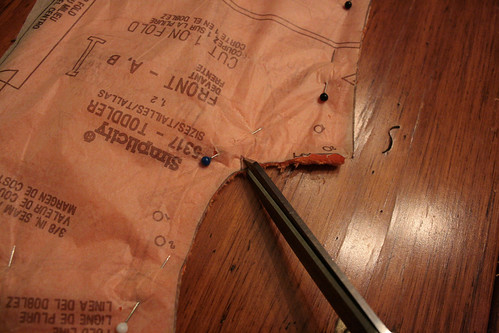
The pattern I used is very intense - it contains 5 different toddler sizes and something like 30 different outfits. I had to re-do the collar about three times. I'd never worked with a strechy fabric, which meant some lines were perfect, others gathered and other completely crooked. And then I decided to just start over on the shirt. The main reason is that I followed the pattern on how to set up the pattern pieces on the fabric. The only problem with doing that (which I didn't discover until after the shirt was done) was that the stretch of the fabric was going up and down, versus horizontally. Which is what you want - so the neck can strech or the belly a bit, etc. If you're working with a stretchy fabric I recommend first figuring out where you want the fabric to stretch, and then putting your pattern pieces down accordingly. The shirt fit great once it was on, but having that little bit of stretch would have made much, much easier to get on. In the end I wound up re-doing the shirt (for a few reasons, but this being one).
3. Get the size right. When in doubt make it larger.
Take your child's measurements (easier said than done), and then check the back of the pattern for the correct size. That will tell you which pattern pieces to follow. The problem I faced is that my son is very tall, but also rather thin. His height put him in one size and his waist in another. I wound up making the pants in the larger size so they were long enough and adding a bunch of elastic to keep them up. The shirt fit him great. Nice and tight. But then I realized - it's Halloween - it's going to be cold. And I didn't want him to wear a jacket unless he had to. So I decided to re-make the shirt in a larger size (and get the stretch in the right places). And it's a good thing I did because I wound up putting his pajamas and a sweater on underneath the costume to keep him warm. Also check the stretch of the fabric before making the hat. If it doesn't have a lot of stretch I'd recommend making the next size up in the hat.
Do your best to get the size right the first time though. The way the pattern pieces are drawn one on top of the other, you may be destroying the next size up's pattern when you cut the one out that you need. You can always fudge a little if you need to. This pattern did seem to leave some extra fabric for adjusting height of the pants, sleeves and bottom of the shirt.
4. Embellishments go on first
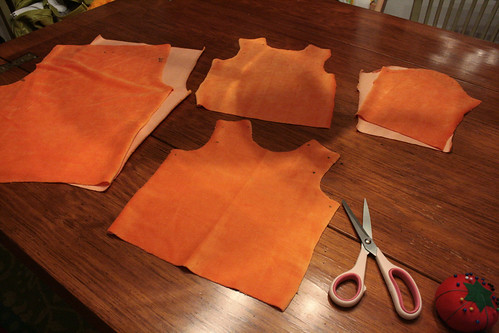
The first time I made the shirt I waited to sew the decorations on until the end. Wrong. These have to go on first - otherwise it will be next to impossible to sew these on. That is why this costume doesn't have the white edging around the bottom of the sleeves. I had already sewn them together and would have had to take the seams/hem out in order to do so. I tried to use fusing to iron them on, but since I had chosen a velour fabric I had a very hard time trying to get them to stick.
But do remember your child is only going to wear this a few times (if more than one) so it doesn't have to be perfect. At least that's what I kept telling myself. My lines weren't straight in the end, and there was actually a little hole in the waist band, but it looked ok and that is what matters. Plus, Q isn't old enough to care (yet).
4. Buy your basic fabrics at the el-cheapo craft store
I used felt for the white embellishments. But I bought it at G Street Fabric. I didn't like the yellow color they had so I went around the corner to a craft/fabric store. The felt there was about half the price. They didn't have anything good for the hat or the main costume so I'm glad I bough those at G Street, but for any generic colored fabrics get the cheapest you can find.
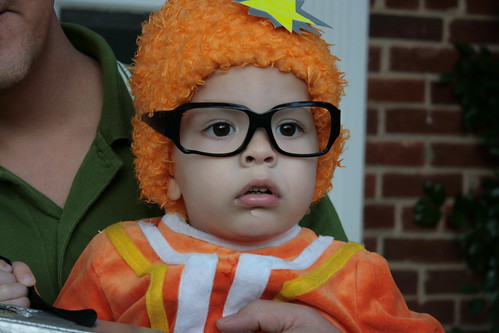
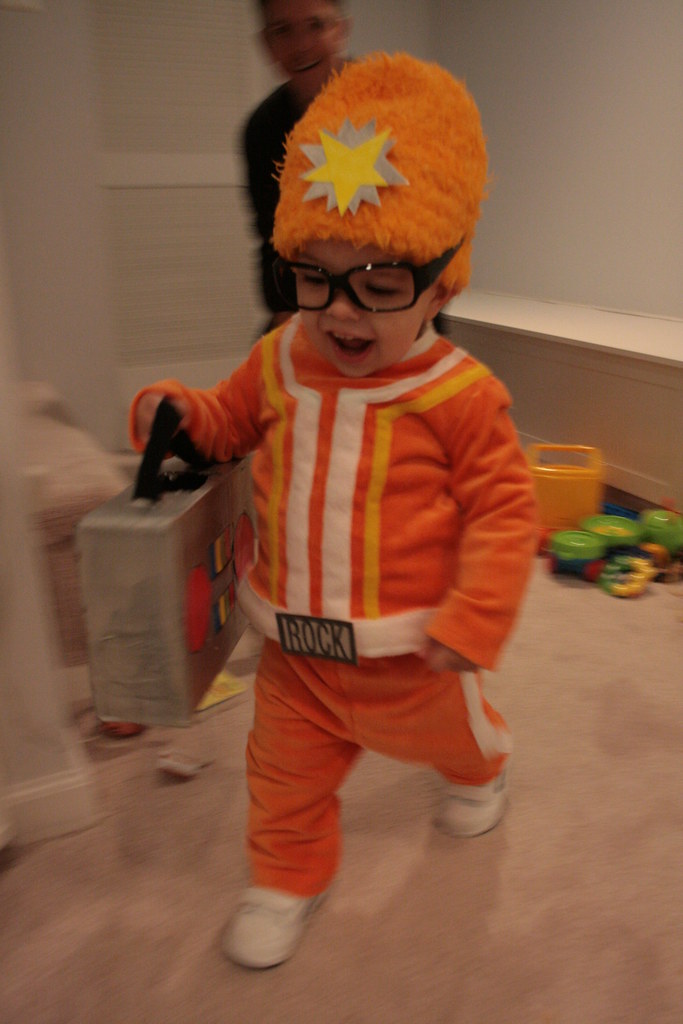
5. Glasses, Boombox & Beltbuckle
We got litle kiddy sunglasses at Target. I think they were Camp Rock or something. Then popped the frames out. My husband took a sharpie to cover up the logo on the sides and voila! He spray painted a small Amazon shipping box silver and I drew the shapes on the computer, printed them in color and used an exacto knife to cut them out. We used a gluestick to attach them. I also set the 'ROCK' type on my computer and then printed it out. Mike cut that with and exacto knife and glued it on a piece of silver spray painted cardboard. I'd recommend not using spray paint though - aluminum foil or silver wrapping would have been easier and probably less toxic. Q wanted to carry the box around but kept banging it to the wall or throwing it, causing little bits of paint to come off as well. Mike cut a hole in the top so he could use it as his candy bag when he went trick or treating.
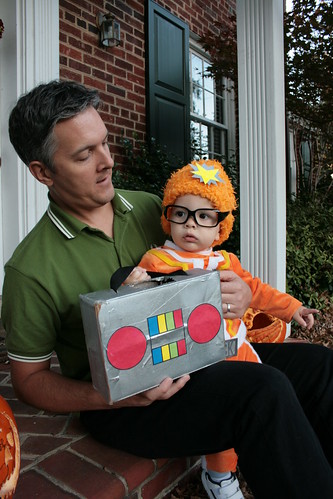
A lot of people had no idea who Q was. In fact a few thought he was Austin Powers. It didn't really matter though because as soon as they saw him coming they started cracking up. Seriously, how can you not laugh at a little kid wearing glasses like those? And to think I had had actually thought of making a Brobee costume, but decided that DJ Lance's costume would somehow be easier. Ha.